Building a screen printing press – Part 4
Spring loaded bistable lifting and lowering
In this post, we are going to explore how to go about building a part that looks and works something like shown in the video.
A swinging arm pivots around a fixed point, and a spring causes the mechanism to have two rest positions (a bistable system); one position of rest is where the screen is raised, and another point of rest is where the screen is lowered to a horizontal position.
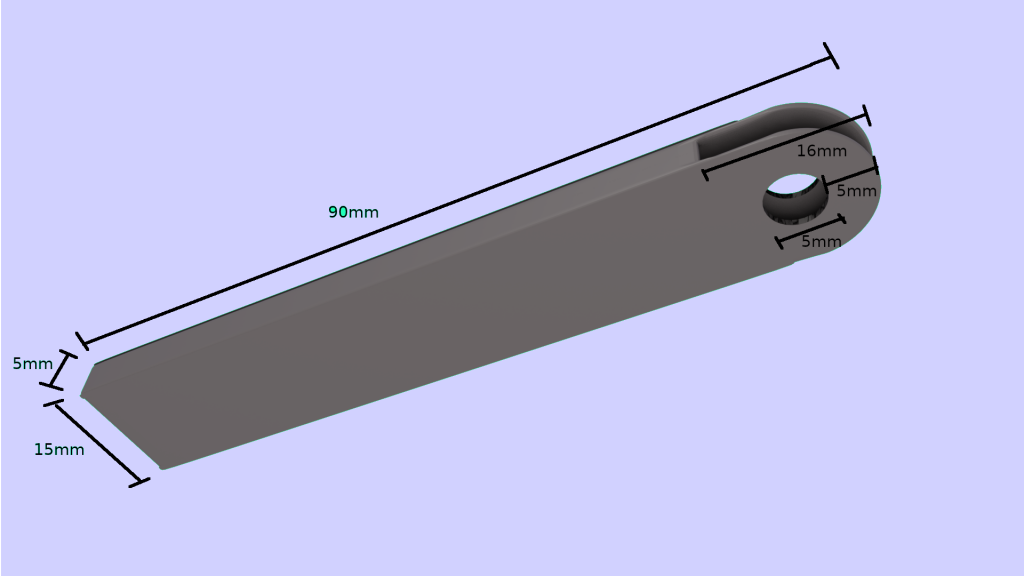
We start with four 90mm long sections of 15x5mm rectangular aluminum edging.
This kind of material is readily available in standard sizes from hardware stores.
Using a Dremel tool with a metal cutting wheel, or alternatively a hack saw and file, we shape one end until it forms a semicircle. Then, using a file, refine and shape the end by extending the slot on the top and bottom until it is at least 16mm from the rounded end.
We drill a 5mm hole all the way through the center of the semicircle end.
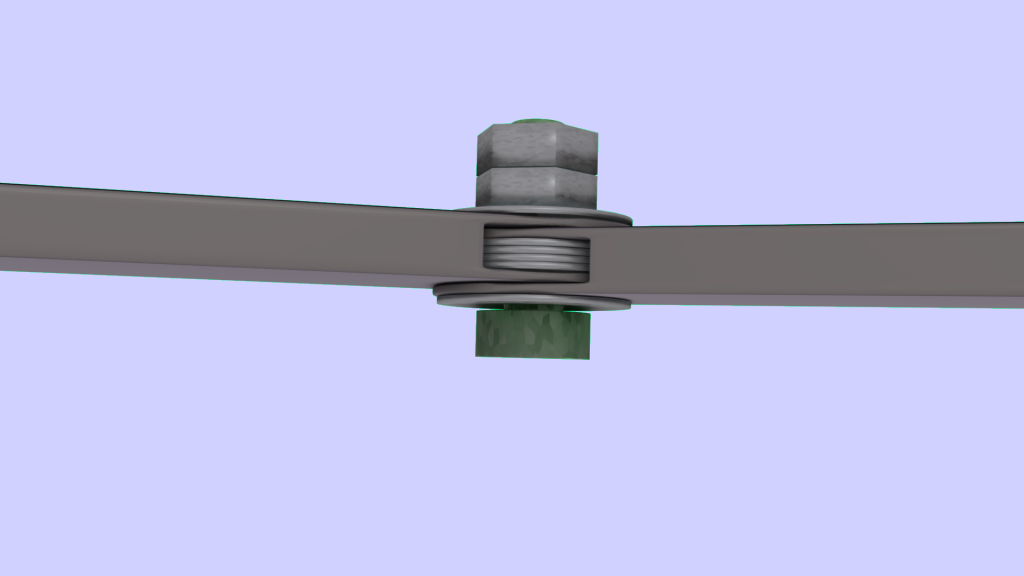
Once the four strut pieces have been prepaired, we fit them together in pairs, using two 5mm nuts and bolt, and 6 round 5mm washers having a diameter of around 15mm. The fitted piece should look like the illustration.
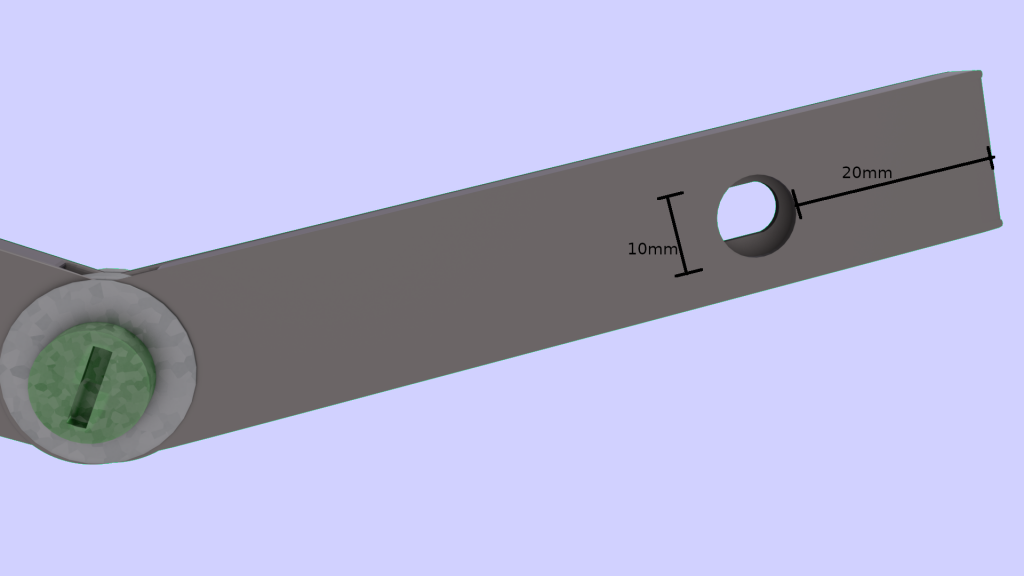
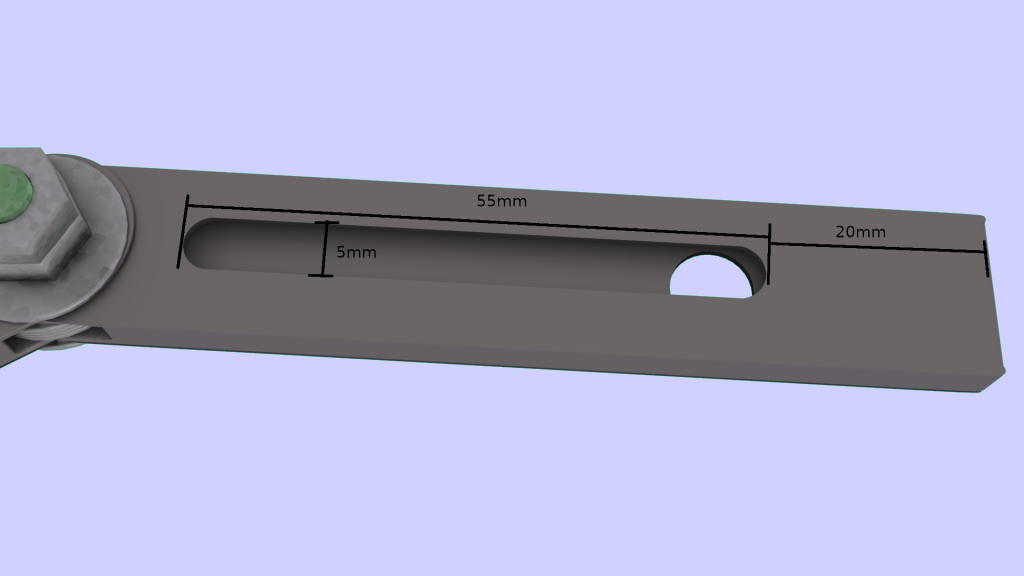
One of the two struts in each pair, the lower (or swing) strut, will need a 9mm or 10mm hole drilled on one side, and a 5mm slot cut on the other. The 10mm hole will be 20mm from the far edge, and the slot will start the same distance from the edge (on the other side), and be 55mm in length.

The top (or bracing) strut will need a 5mm hole drilled on one side, 8mm from the short edge. A 5mm bolt is attached to the bracing strut by means of two nuts through this hole from the side. This bolt will become our top anchor for our spring. Two additional nuts on the same bolt will serve as an adjustable fence, and prevent the spring from chafing against the struts.

A similar arrangement provides a spring anchor for the lower (swinging) strut.
Once all is ready, it is time to mount our finished mechanism in place against the vertical positioning unit, and connect the springs. Our braces are already mounted as described in our previous post, so mounting the struts is quite intuitive.
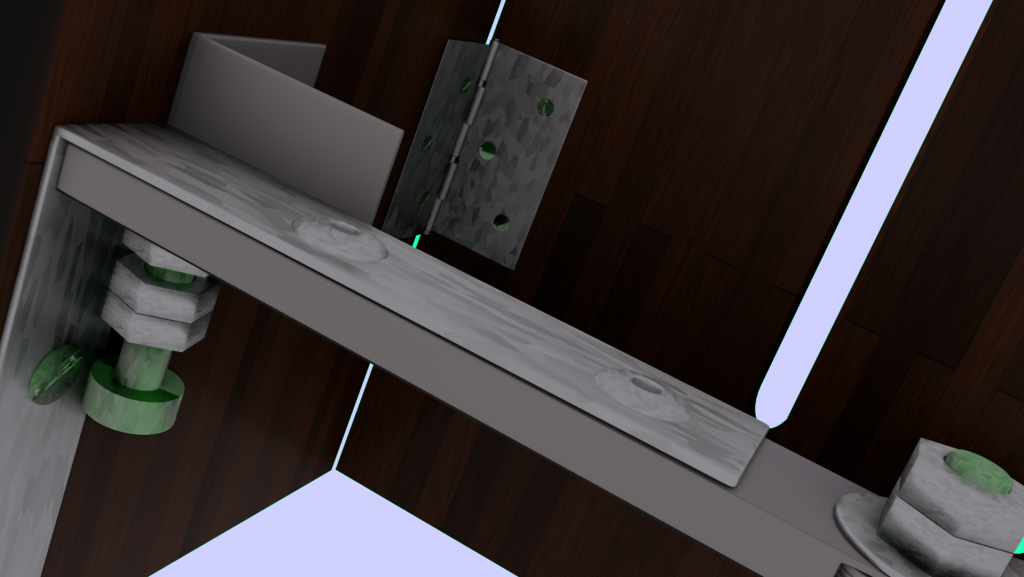

The top strut is connected to it’s braces using rivets and clear epoxy glue. There are two rivets from the side, and one from below. Holes will need to be drilled to accomodate those rivets, and their size and exact position will depend on the actual braces used in the mount. So we won’t attempt to provide measurements here. We suggest using a 3.8mm rivet.
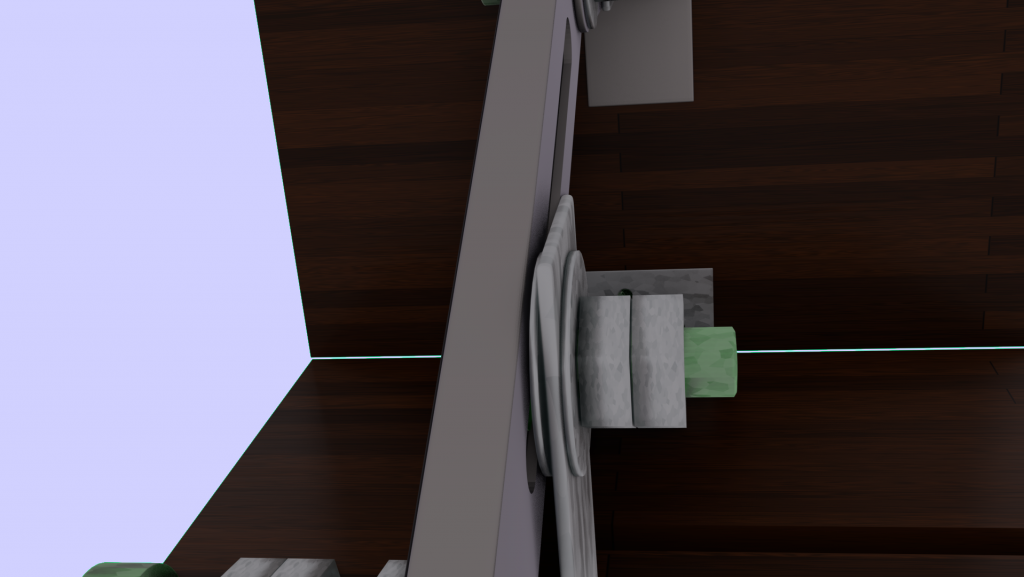
The bottom strut is connected by inserting a 5mm screw with a rounded head through the convenient hole behind the slot, and fastened to the bracket by means of two 5mm nuts and two 5mm washers. Leave some play to allow the connection point to slide easily along the 55mm long slot, but don’t leave it too loose.
Finally, attach a spring between the upper and lower anchor points, and we should have a working spring mechanism which will hold our screen up and out of the way when we need it to, but allow us to easily lower the screen to a horizontal position over our platen when we want to print.
3 Comments
Kuliah Terbaik · 17 December 2023 at 10:15 am
Could I receive your authorization to copy your article? It has broadened my understanding and empowered me to pursue my goals.Your dedication is truly commendable. Can you visit my website too?? at Kampus Terbaik Thanks! ID : CMT-NQA6Q05GRIR6Y7I8ZX
copy and paste invisible character · 1 June 2025 at 1:42 pm
Excellent article! We will be linking to this particularly great article on our site.
Keep up the great writing.
my blog post: copy and paste invisible character
youtube downloader for windows · 2 July 2025 at 11:55 am
Great info. Lucky me I came across your site by
accident (stumbleupon). I’ve book-marked it for later!