Building a screen printing press – Part 2
The working surface and back plane
Our press is made to be laid flat upon a table, or other flat sturdy surface, so that it may be conveniently stashed out of the way when not in use. The base consists of a large, 800mm x 800mm x 16xmm white melanine coated chipboard or MDF section.
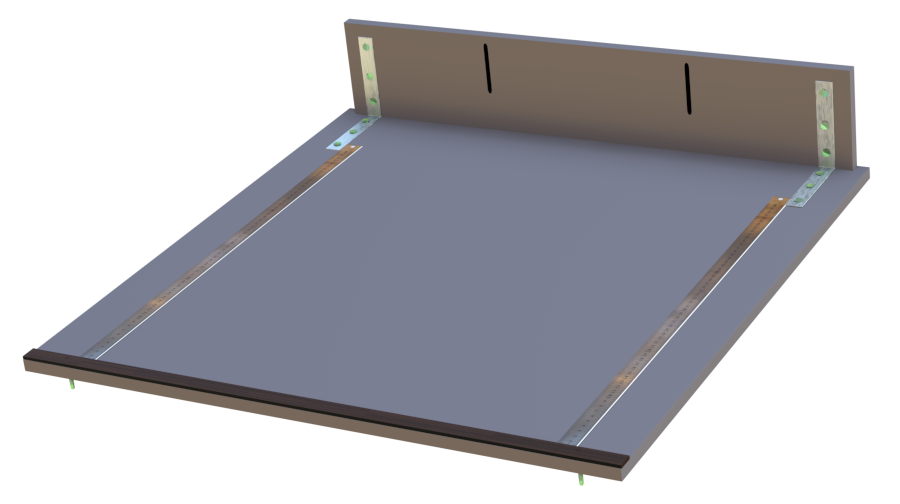
The back plane is of the same material, and measures 140mm x 764mm x 16mm. The back plane is mounted against the base by means of two 120mm x 120mm x 25mm steel brackets. The brackets are 40mm from either side of the base. The join between the back plane and base may be inset and glued, or simply glued if one does not have equipment to make an inset groove.
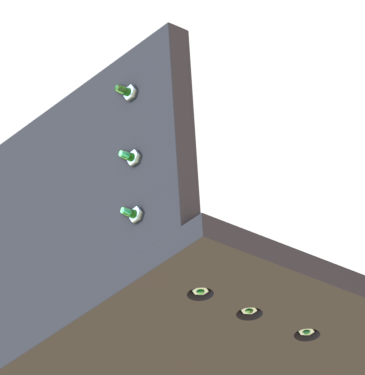
The screws used to attach the brackets to the base are inset at the bottom, allowing the base to lie flush against a table without scratching the surface. Felt strips, or a similar alternative is glued to the bottom of the base to ensure that it will not slip, and further protect the table upon which the base will lie.
Two vertical slots are cut in the back plane, 180mm from the short edge and just over 5mm wide. The slots are 75mm long and start 10mm from the top edge of the back plane. These slots will be used for attachment of further components to the base.

Two 5mm holes are drilled through the base, 62mm from the left and right base edges, and 14mm from the front edge. Some long 5mm flat head screws are inserted into these holes such that the screw head is flush with the surface. A hexagonal nut inset into the base from below holds each screw in place. We will be mounting a screen tensioning device below the front edge of the base, using these screws.
We glue a 800mm x 20mm x 5mm strip of wood along the front edge of the base, to be used as a fence. This wood strip also covers the holes we drilled through the base. Two 60cm steel rulers are glued flat between the fence and the inside edge of the steel brackets which hold the back plane up; the reason for these rulers will be explained later.

0 Comments